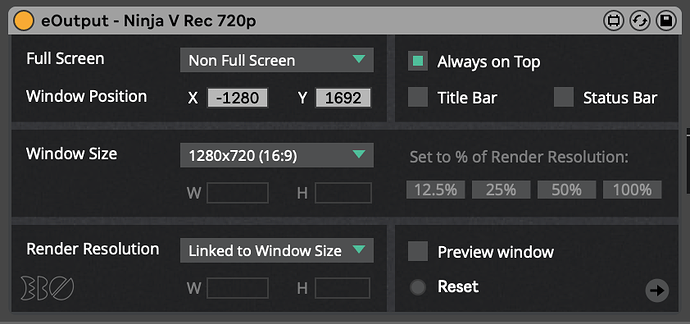
To control the output window use the eOutput plug-in (in the Tools folder in the EboSuite plug-in folder). With that plug-in you can set EboSuite’s output window to full screen on the HDMI output you are using for recording. In my case I have two screens connected and I set the output window to full screen on my second HDMI output. In this example I am recording 1280x720, so I set the HDMI out resolution to 1280x720.
Use the eOutput plug-in to set EboSuite’s output window size to 1280x720 and then set its position to fit the second HDMI output exactly.
Point 0,0 (X=0 and Y=0) is at the bottom left corner of your primary display (the display with the Apple menu, HDMI output 1 in my case). Since my 2nd HDMI output is on the left side of the HDMI 1 output, I moved it 1280 pixels to the left (X = -1280) and 1692 pixels up (Y = 1692), because the resolution of HDMI 1 = 3008 x 1692 in my case. Make sure to turn off the Title Bar of the output window, because you don’t want that to be in the recording.
You can also use the Full Screen option, but I like to do it this way. I saved a few presets of the eOutput plug-in in my User Library (a preset for 1280x720 and 1920x1080), so I just drag that preset on the eOutput window to position and scale it quickly.
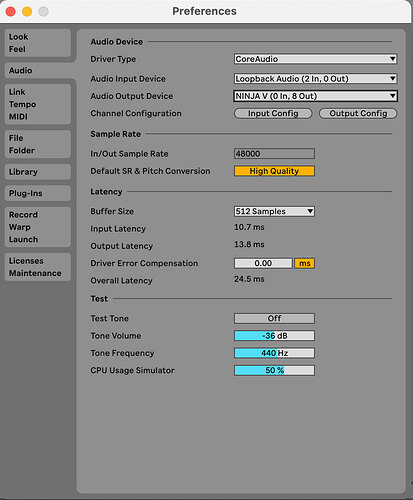
In Ableton Live’s Audio preferences select the HDMI output as your Audio Output Device.


